
Assigning Cloud VLAN
Learn how to assign a Cloud VLAN to your server.
1. Getting Started
- Make sure you have a Cloud VLAN product: https://www.netcup.com/en/server/kvm-server-extensions
- Note that the Cloud VLAN must be configured at the same location as your server.
- Once the booking is complete, a button will appear in the Server Control Panel (SCP) under Network.
2. Opening the Server Control Panel (SCP)
- Log in to the Server Control Panel (SCP).
- Select the server to which you want to add a VLAN.
- Go to Network.
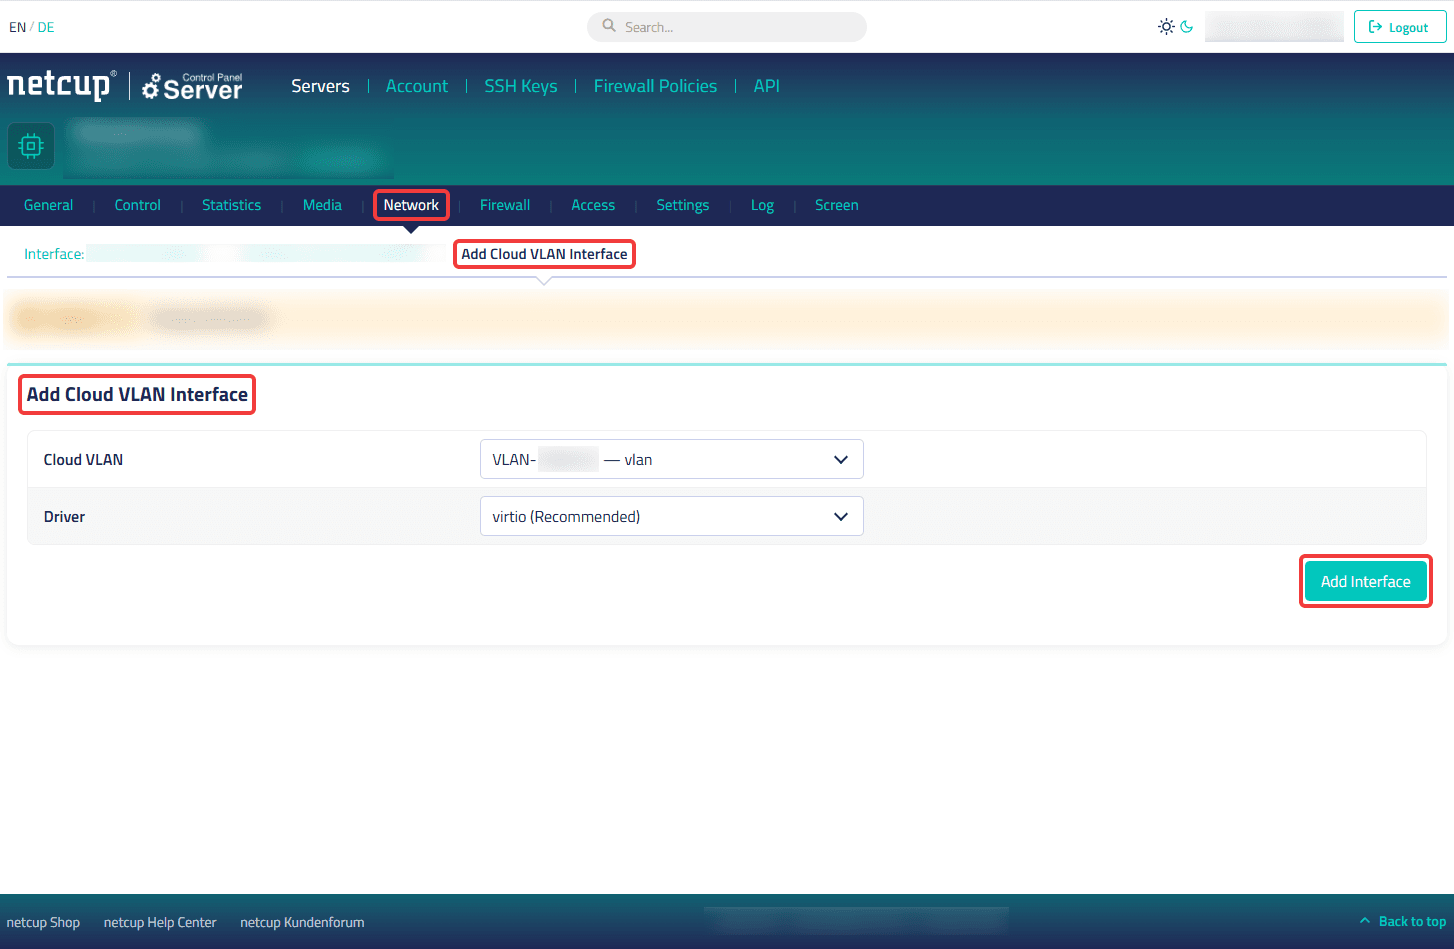
3. Adding VLAN
- Click Add Cloud VLAN Interface at the top.
- Select the desired Cloud VLAN from the drop-down menu.
- Select a Driver from the drop-down menu.
- Click Add Interface to the right.
- The VLAN will then appear as a new interface at the top. In the settings, you can rename it, change the driver, or delete the VLAN.
4. Configuration at Operating System Level
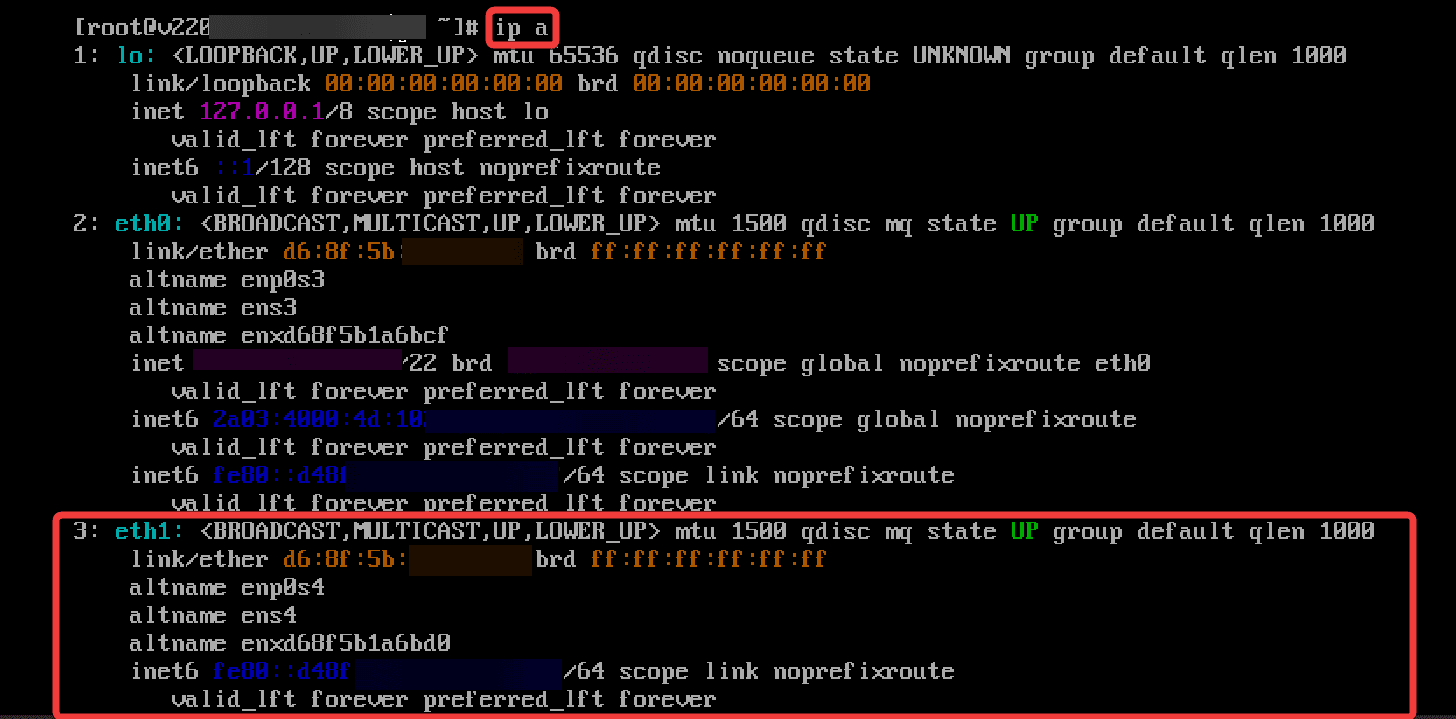
- Check whether the network interface is available. On Linux systems, you can usually verify this using
ip a. - If the interface isn't listed there, restart your server or check via the Rescue System.
- Configure at the operating system level which traffic should be sent over the VLAN. Follow the instructions provided by your operating system and applications.
5. Frequently Asked Questions (FAQ)
You may also be interested in:
Last update: 25 June 2026
Was this article helpful?