
Hosting Settings
Learn how to customize your hosting settings.
1. Opening the Customer Control Panel (CCP)
- Log into the Customer Control Panel (CCP).
- Go to the Products menu item.
- Click the Magnifying Glass Icon next to the web hosting instance you want to manage settings for.
- Scroll down and select your desired domain under Select domain.
- Click on Hosting Settings.
2. Managing Hosting Settings
- You will be redirected to the Webhosting Control Panel (WCP) for the selected domain.
- In the new window, you can customize your hosting settings and configure scripting and security settings.
- Make the necessary changes and click Apply to save them.

3. Managing Domain Settings
To make domain-specific changes to the settings, especially with regard to the document directory and hosting type, proceed as follows:
- Go back to your Customer Control Panel (CCP).
- Go to the Products menu item.
- Click the Magnifying Glass Icon next to the web hosting instance you want to manage settings for.
- Select the domain you want to work with.
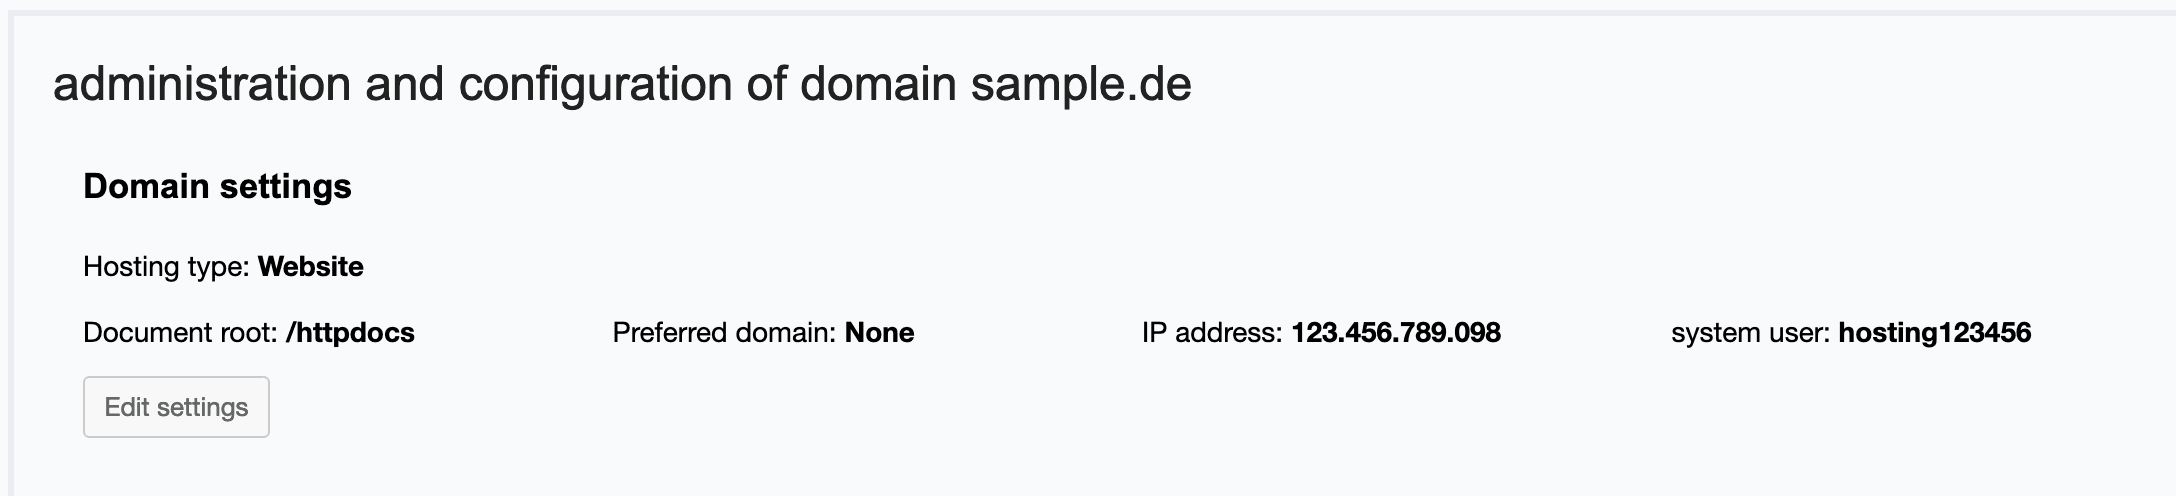
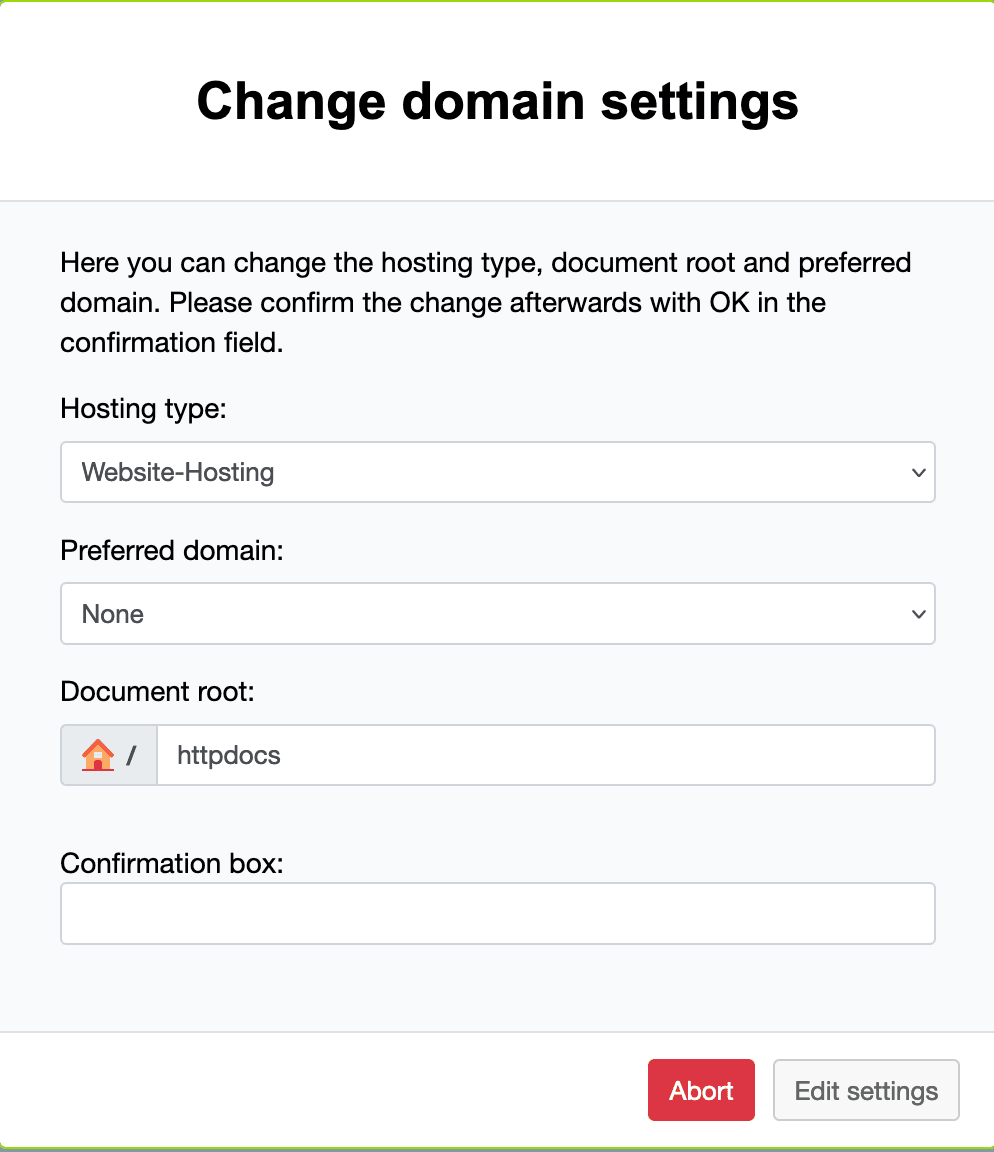
5. Click Edit settings.
Here you can make changes to the document root, hosting type, etc.
Last update: 2 March 2026
Was this article helpful?