
Storage Space
Add more space to your vServer with an additional Storage Space.
You can also add more storage space by using Local Block Storage: Local Block Storage
1. Overview
A Storage Space is an additional storage that is provided by a storage server in our data center. It can be shared by multiple VPS or root servers.
The Storage Space is accessed via Network File System (NFS) and is therefore available not only on Linux and Unix-based operating systems, but also on Windows systems. You can also access the Storage Space from outside, e.g., from your office or a server in another data center.

A Storage Space is part of the contract for a vServer. This means that if the vServer is canceled, the Storage Space will also be deleted.
2. Ordering Storage Space
- Log in to the Customer Control Panel (CCP).
- Go to the menu item Products and click the Magnifying Glass Icon next to the product for which you want to add storage space.
- Go to Storage Space.
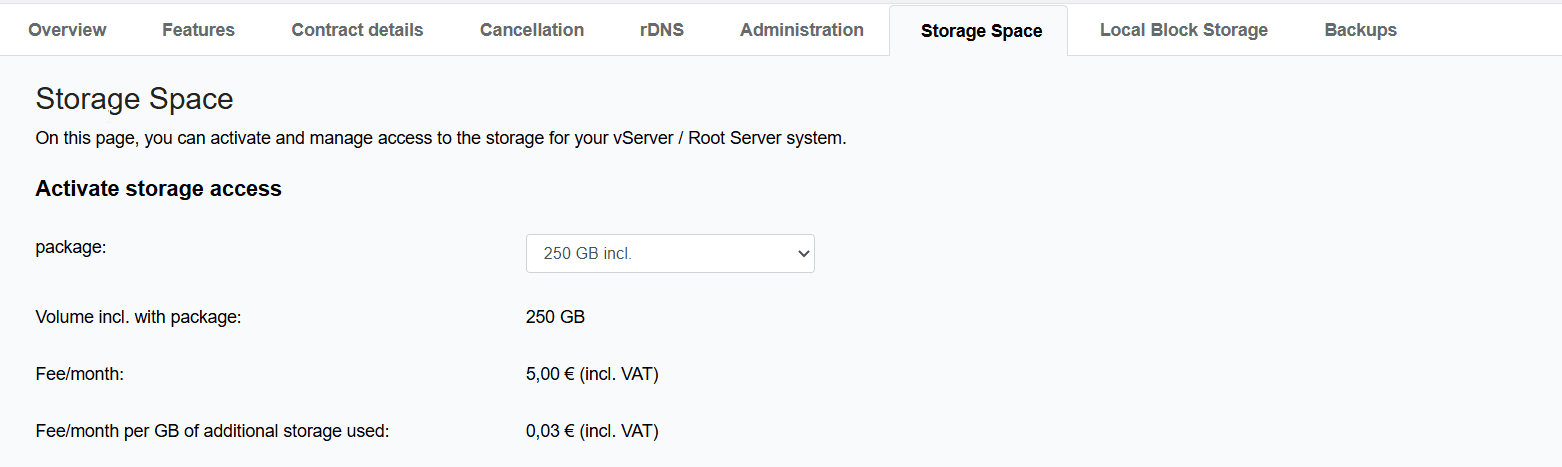
- Select the desired plan.
- Read the information about the terms and conditions and the price and accept them by checking the box.
- Click Order Storage.
- Your Storage Space and the data required for connection will then be displayed.
3. Canceling Storage Space
- Log in to the Customer Control Panel (CCP).
- Go to the menu item Products and click the Magnifying Glass Icon next to the product for which you want to cancel storage space.
- Go to Storage Space.
- Click Cancel Volume next to the corresponding Storage Space.
- Make sure you agree to the irrevocable removal. All data stored in the Storage Space will be deleted immediately.
- Enter OK in the confirmation field and then click Cancel Product.
- The Storage Space has been successfully canceled.
4. Managing Storage Space
Access control to the respective Storage Space is controlled out via IP-based authorization. Go to the desired Storage Space in the Customer Control Panel (CCP). Enter the IP address to be authorized in the field New IPv4 authorization and click Authorize IP.
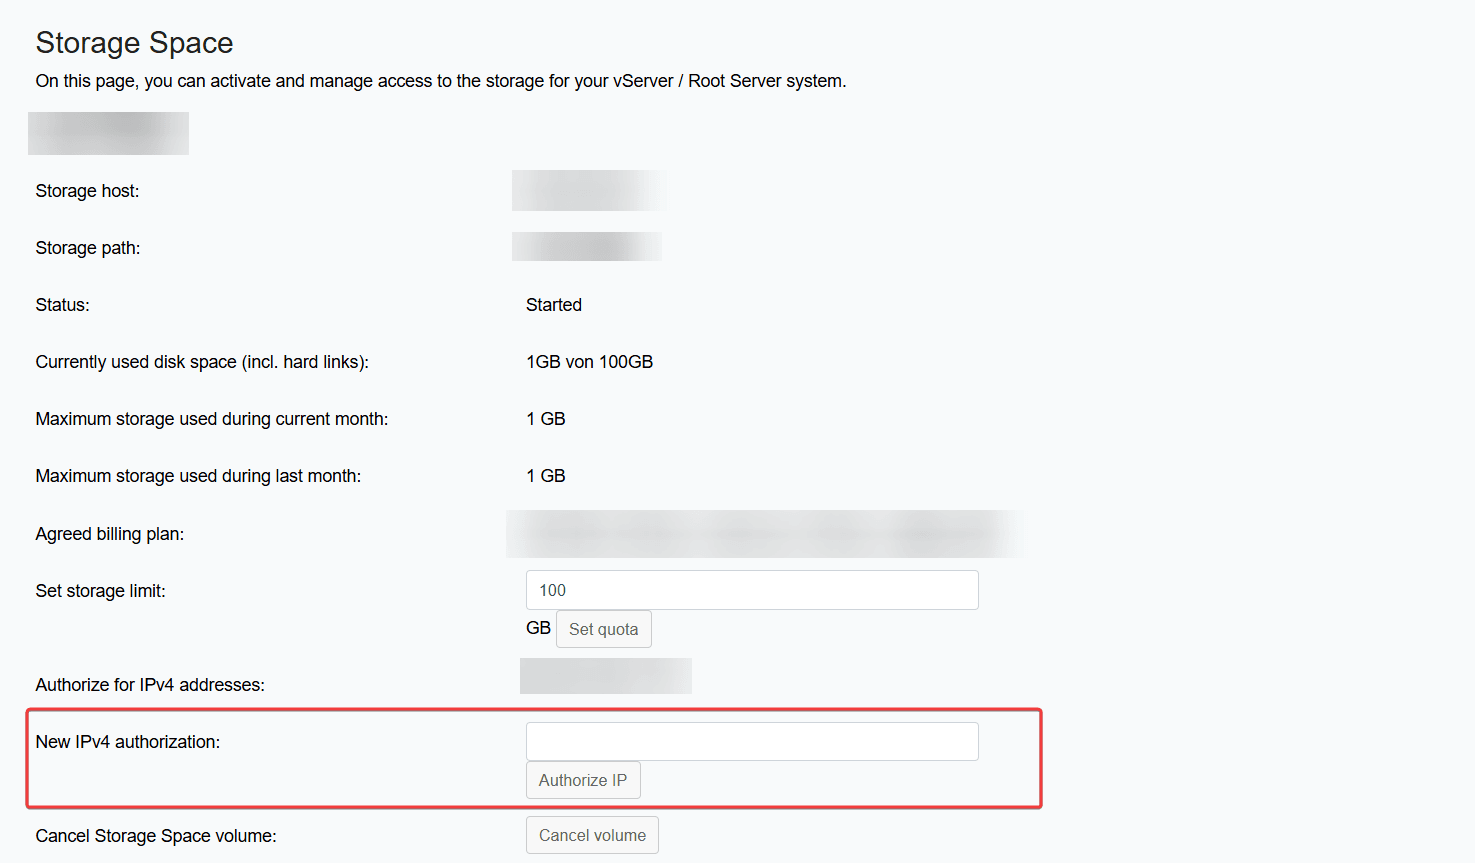
You can use the following tool to display your IP address: Your IP Address
Transferring Storage Space
For technical reasons, it is not possible to transfer a Storage Space to another server. To transfer the data from a Storage Space, you must book a new Storage Space for the desired server. Next, connect both servers using NFS and transfer the data in the file system.
Increasing Storage Space
To guarantee our affordable prices, we host the packages on different servers. Therefore, it is not possible to upgrade your existing Storage Space. To upgrade, you must book a new Storage Space for the desired server. Then connect both servers using NFS and transfer the data in the file system.
Traffic
Depending on the plan you choose, you will have a certain amount of monthly traffic available. Note that only the traffic volume included in the plan can be used. As soon as the traffic volume is exceeded, the associated Storage Space will be frozen until the end of the calendar month. Currently, we do not provide traffic statistics. It is therefore your responsibility to log your traffic usage yourself.
5. Mounting Storage Space
Linux
Installation of nfs-common
Install nfs-common to access NFS storages:
apt-get install nfs-common
Creating Mount Point
If you want to mount your storage space to /mnt/storagespace, for example, you must first create the mount point:
mkdir /mnt/storagespace
Mounting Storage Space
You can now mount the Storage Space:
mount -t nfs IP:/STORAGEPFAD /mnt/storagespace
Replace IP and STORAGE PATH with the actual IP address and path of your Storage Space.
Mounting Storage Space Permanently
You can configure the Storage Space to be mounted automatically when the system starts. To do so, define the mount point permanently in the file /etc/fstab.
1. Edit the file /etc/fstab with a text editor.
2. Add the following line at the end of the file:
IP:/STORAGEPATH/mnt/storagespace nfs nolock,nfsvers=3,defaults 0 0
Replace IP and STORAGE PATH with the actual IP address and path of your Storage Space.
3. Unmount the currently manually mounted Storage Space:
umount/mnt/storagespace
4. Remount all mount points from /etc/fstab:
mount -a
5. Check whether the Storage Space has been successfully mounted:
mount
If the mount was successful, the configuration is complete and the Storage Space will now be automatically mounted at every system startup.
Windows
Installing NFS Client
The NFS client is not installed by default and must be added manually:
- Open the Server Manager in Windows and click Manage > Add Roles and Features.
- Follow the instructions of the wizard until you reach the Features section.
- Select Client for NFS and complete the installation.
Making Changes to the NFS Client
- Open the Server Manager and go to Tools > Services. Find the NFS client and stop it.
- Start the Windows Registry Editor (regedit) and navigate to:
HKEY_LOCAL_MACHINE\SOFTWARE\Microsoft\ClientForNFS\CurrentVersion\Default
- Create 2 new DWORD-entries:
- Right-click > New > DWORD Value (32-Bit)
- Name the two new entries AnonymousUid and AnonymousGid.
- Set the decimal value of both entries to 0.
- Return to the Server Manager, go back to Tools > Services, and restart the NFS client.
Mounting Storage
You can now mount the storage as a network drive: net use X: \\IP\VOLUME
Replace IP and VOLUME with the actual IP address and volume of your Storage Space. You can find the respective information in the Customer Control Panel. The letter X: stands for the drive letter and can be adjusted as needed and depending on the letters already assigned.